LG 47WV30BR-B Owner's Manual Page 10
- Page / 80
- Table of contents
- TROUBLESHOOTING
- BOOKMARKS
- MONITOR SIGNAGE 1
- CONTENTS 2
- 59 TROUBLESHOOTING 3
- 62 SPECIFICATIONS 3
- 64 RS-232 CONTROL 3
- < 47WV30MS/47WV30BR > 6
- (CONTROL) 8
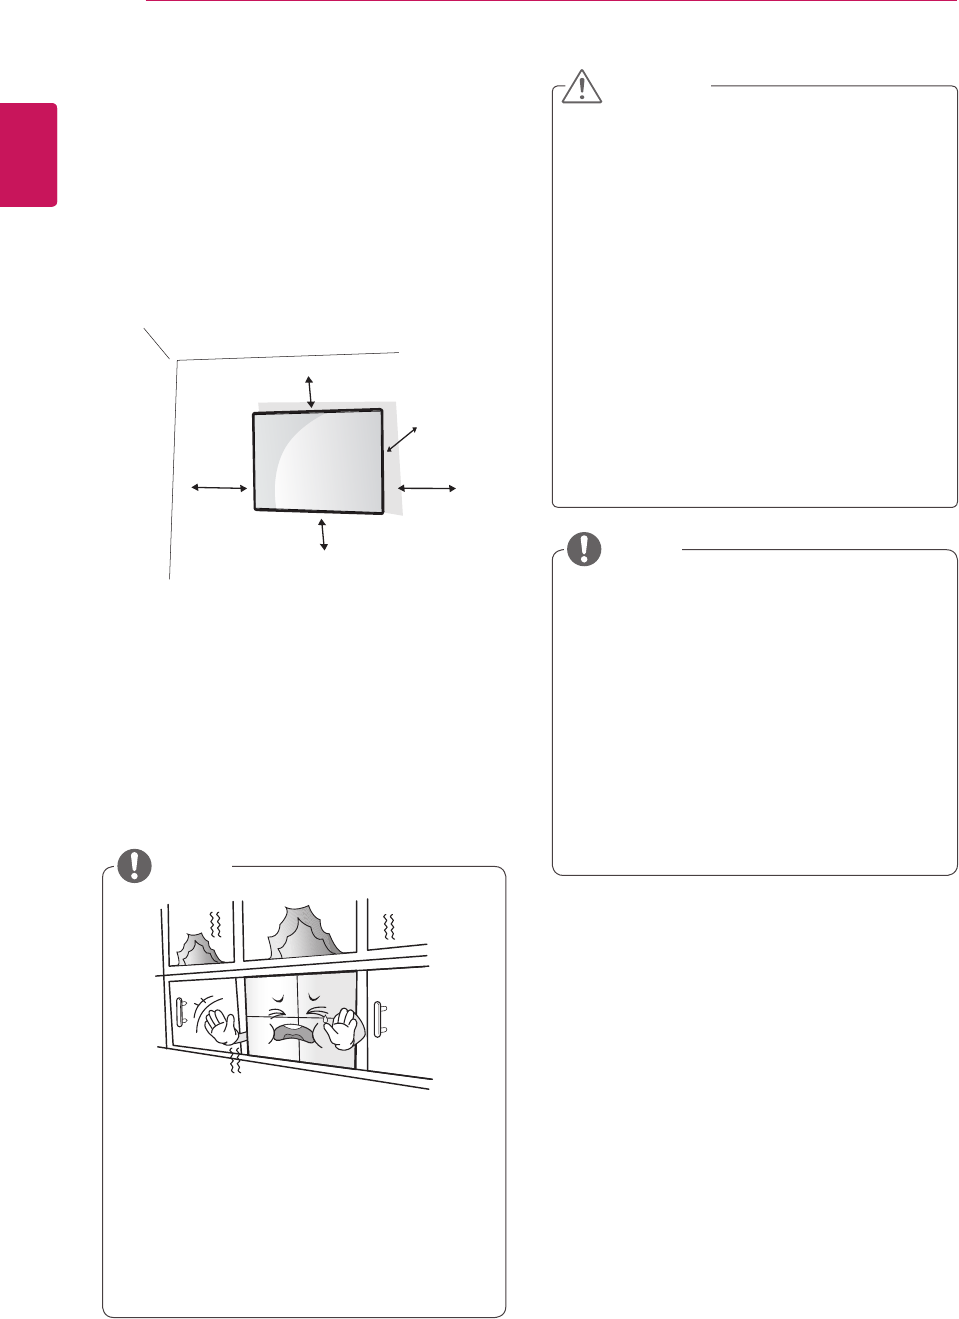
- Installing on a wall 10
- (RGB/DVI) 11
- CONTROL IN 11
- Tiling Displays 12
- ASSEMBLING AND PREPARING 13
- U-shaped xture 14
- Inserting the Cable Holder 16
- REMOTE CONTROL 17
- Picture ID 20
- RGB connection 21
- HDMI connection 22
- DVI connection 22
- Audio connection 23
- IR Receiver connection 23
- Selecting an image mode 24
- Customizing image options 24
- Selecting an sound mode 25
- Customizing sound options 26
- Adjusting aspect ratio 26
- Just Scan 27
- Connecting to a wired network 28
- Network Status 29
- Connecting USB storage de 30
- Browsing files 31
- Viewing movies 32
- 5 Play a movie 33
- ENTERTAINMENT 34
- Viewing photos 36
- Slideshow BGM 37
- Transition Effect Option 38
- Listening to music 39
- 002. B02.mp3 40
- ► 00:31 / 04:04 40
- DivX® VOD Guide 41
- MAINTENANCE 42
- CUSTOMIZING SETTINGS 43
- PICTURE settings 44
- Basic image options 45
- Advanced image options 46
- AUDIO settings 47
- TIME settings 48
- OPTION settings 49
- Tile Mode 52
- Tile Mode - Natural mode 52
- NETWORK settings 53
- MAKING CONNECTIONS 54
- DVI - HDMI connection 55
- AV connection (Only 47WV30BR 56
- Component connection 56
- LAN connection 57
- RGB Cable 58
- DVI Cable 58
- TROUBLESHOOTING 59
- Problem Resolution 60
- SPECIFICATIONS 62
- DTV Mode 63
- 1 to 10: RGB Mode 63
- * : HDMI/DVI mode 63
- PC supported mode 63
- RS-232 CONTROL 64
- Command Reference List 65
- 47WV30MS 80
- 47WV30BR 80
- 47WV30BS 80
- 47WV30-BAAM 80
- 47WV30-BAAL 80
Related products and manuals for Public displays LG 47WV30BR-B
 (74 pages)
(32 pages)
(2 pages)
(84 pages)
(80 pages)
(2 pages)
(85 pages)
(87 pages)
(2 pages)
(27 pages)
(2 pages)
(88 pages)
(86 pages)
(72 pages)
(84 pages)
(84 pages)
(84 pages)
(45 pages)
(90 pages)
(89 pages)
(74 pages)
(32 pages)
(2 pages)
(84 pages)
(80 pages)
(2 pages)
(85 pages)
(87 pages)
(2 pages)
(27 pages)
(2 pages)
(88 pages)
(86 pages)
(72 pages)
(84 pages)
(84 pages)
(84 pages)
(45 pages)
(90 pages)
(89 pages)
© 2020, manymanuals.com. All rights reserved. | 0.352 s |
 Manymanuals.com
 Manymanuals.de
 Manymanuals.fr
 Manymanuals.it
 Manymanuals.pl
 Manymanuals.cz
 Manymanuals.es
 Manymanuals-pt.com
Comments to this Manuals